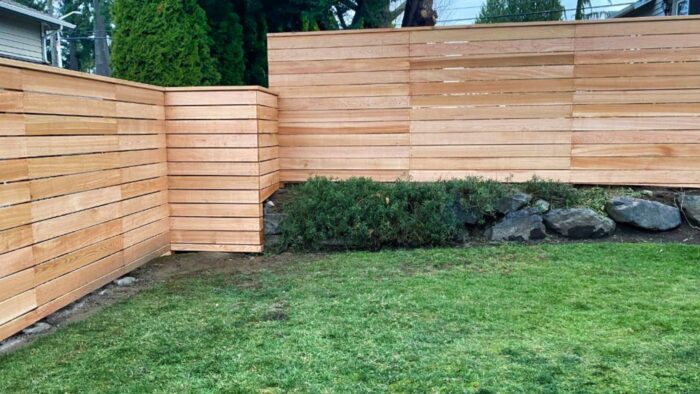
A harsh winter can take a toll on your fence, leaving it looking worn out and in dire need of a refresh. As the weather warms up and spring approaches, it's time to turn your attention to this often-neglected part of your property...
Introduction
A harsh winter can take a toll on your fence, leaving it looking worn out and in dire need of a refresh. As the weather warms up and spring approaches, it’s time to turn your attention to this often-neglected part of your property. This guide offers practical advice on how to restore your fence to its former glory, and offers preventative measures to ensure it withstands future winters.
Understanding the Impact of Winter on Your Fence
Winter’s conditions can be particularly harsh on fences. It’s crucial to understand how the cold, moisture, and wind can affect different types of fencing materials, so you know what to look out for when you begin your inspection and repair process.
Wood Fences
Wood fences, while aesthetically pleasing, are particularly vulnerable to winter weather. Moisture from snow and ice can seep into the wood, causing it to expand and contract, leading to warping or cracking.
Metal Fences
Metal fences aren’t immune to winter’s wrath either. Rust can form when the protective coating on the metal is compromised, and freezing conditions can speed up this process.
Vinyl Fences
Vinyl fences may fare better in winter conditions, but they’re not invincible. Excessive weight from heavy snowfall can cause bending or breaking, and frigid temperatures can make the material brittle.
Inspecting Your Fence: Identifying Areas of Concern
Fence inspection is the first step in fence rehabilitation. Look for signs of damage such as splintering, warping, discoloration, or rust. Cracked posts, loose nails or screws, and unstable sections of the fence are all indicators that repair is needed.
Repairing the Damage: Tools, Techniques, and Safety Tips
Once you’ve identified the areas of damage, it’s time to gather your tools and start the repair process. This can involve replacing damaged boards, securing loose components, sanding rough areas, and applying a protective coating. Always remember to prioritize safety by wearing appropriate personal protective equipment (PPE).
Replacing Damaged Boards
Start by removing the damaged board using a crowbar or a similar tool. Measure the length of the replacement board, cut it to size, and affix it to the fence using nails or screws.
Securing Loose Components
For loose nails or screws, either tighten them or replace them entirely. If an entire section of the fence is unstable, additional support may be needed. This could involve installing a new post or reinforcing the existing one.
Sanding and Finishing
Use sandpaper or a power sander to smooth out rough areas, paying particular attention to areas that are prone to splintering. Once the fence is smooth, apply a coat of primer followed by a protective paint or stain. This not only enhances the appearance of your fence but also adds an extra layer of protection against the elements.
Cleaning the Fence
A clean fence is easier to work on, and it allows you to see any hidden damages. Use a pressure washer to remove any dirt or grime, and consider a specialized cleaner for any mold or mildew.
Cleaning Your Fence with a Pressure Washer
If you opt for using a pressure washer, be cautious not to exceed the recommended PSI to avoid damaging the wood; electric washers are less harmful than gas-operated ones. Don’t forget to test the washer on an inconspicuous spot on your fence beforehand to prevent wood damage. A cedar fence usually calls for a pressure range of 500 to 800 PSI, as per the guides.
In case water fails to eliminate the moss, try mixing half a cup of vinegar per gallon of water. Apply the solution onto the moss and leave it for at least 15 minutes, then scrub and rinse off. Another effective option is using baking soda.
If none of the above-mentioned procedures work, you should consider utilizing a sturdy solution, such as Simple Green. Remember, you ought to test it on a hidden spot first. When the fence has dried well (why summertime is ideal), inspect if there is any damage and fix it accordingly. Sand any rough areas and apply a new layer of waterproofing after the fence is clean.
Cleaning Your Fence Without A Pressure Washer
To clean a wood fence without a pressure washer, first cover the ground with plastic sheeting to help protect plants and lawn. Then, gather your preferred cleaning solution, such as a store-bought commercial wood cleaner or a mix of household bleach and warm water. Scrub the fence with a brush and rinse with a garden hose. Once dry, sand down rough areas and consider adding a new coat of waterproofing for protection.
Fortifying Your Fence: Preparing for the Next Winter
Preventative maintenance is key to ensuring your fence can withstand the next winter. This involves routine inspections, prompt repairs, and periodic re-coating.
Routine Inspections
Regularly inspect your fence for signs of damage or wear, and address any issues as soon as they arise. This can prevent small problems from escalating into larger, more costly repairs.
Prompt Repairs
When damage is identified, don’t delay in making the necessary repairs. Procrastination can lead to further damage and compromise the structural integrity of your fence.
Periodic Re-coating
Reapply a protective coating to your fence every few years to maintain its appearance and durability. This will help to protect your fence from moisture, UV rays, and temperature fluctuations.
Conclusion
Revitalizing your fence after a harsh winter requires a diligent approach that involves inspection, repair, and preventative maintenance. By following this comprehensive guide, you can ensure that your fence remains strong and attractive for years to come.


